Wednesday 1 August 2012

How to crack Adobe Photoshop CS5 Manually


Adobe Photoshop CS5 Extended is the professional software for graphics designers and its very helpful in image editing. But the thing is that Adobe Photoshop CS5 Extended is not freeware it means they are just providing the trial version for 30 days after that it will ask you for serial key. If you have used Adobe Photoshop CS5 Extended then you may know that its not allowing fake serial key so we need to crack Adobe Photoshop CS5 Extended. For that just follow the simple steps.


1. Go to C:\Windows\System32\drivers\etc

2.Now download this hosts file and replace your old hosts file with this hosts file

3.Now open Adobe Photoshop CS5 Extended and just enter this serial key

1330-1245-8292-4567-6480-4584 

And press Ok after that it will not ask you for serial key.

Tuesday 31 July 2012

How to delete All Facebook messages in One Click


Facebook Internation website

Facebook is the fastest growing community in the world and it becomes the number one social networking website, and we all have many friends and we always chat with them but its very time consuming to delete chat logs, chat logs are saved in your Facebook messages sections all chat history saved there many people likes to save the history and many wants to delete it. But when you try to delete all conversation one by one it will take time and to reduce this effort you can use a Chrome extension by which you can delete all Facebook conversation with one click, this extension creates a delete all button by which you can delete all messages from your Facebook Logs, its very easy and Simple.

Step 1

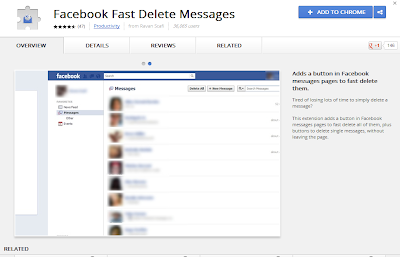
Go to the Extension Page and add this extension to chrome

Facebook delete all chat in one click extension

Step 2

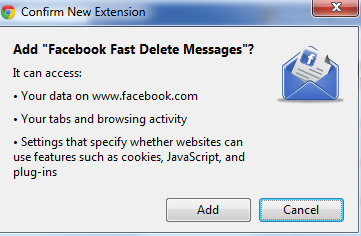
You will be asked for the confirmation of the Installation of extension click on Add Button.

Add to chrome facebook fast chat delete

It's Done.
Now open your Facebook and login with your credentials and when you click on messages you will see the delete all button on the top by which you can delete all conversation with one click in no time.
Delete all chat from facebook in one click

I hope you will like this Trick to delete all Facebook messages without wasting time.

How to increase Processor Speed


There are many steps to increase your processor speed or system performance.
This post is for those people who are having problem with Processor speed. Follow the below steps carefully..
If you are using Microsoft Windows xp,then your processor speed may slow down.Why because Windows Xp carries extraordinary large list of unusual,visual sound effects,menu shadows,high resolution, quality color,fade effects and many.These features may slow down your Processor speed.


By decreasing your Xp resources,your Processor speed may definitely increase.


Firstly disable all the settings in Start up mode.
this can be done by following instructions :

1)Go to “Run”.
2)type “msconfig” in run.
3)Go to Start up.
4)Disable all startup items except Antivirus.

Prefetch files:-


delete all prefetch files.
1)go to run.
2)type prefetch.
3)delete all files.

If you are not having any with work with resolution better you restart your system in Safe Mode.This can be done by continuously by clicking F8 key more than 5times as soon as restart your system. Then a page will open with many options.Choose “Safe Mode“.If you want to do any Networking then choose
“Safe Mode with Networking“.

These two options may remove all your display,resolution,bit size settings etc.
But increase your system speed.

Visual effects:-

1)Right click on “My Computer” >Go to System proporties>Go to Advanced Settings
2)Then click on the Setting in Performance then choose the option”Adjust for best appearance”or you
can choose”custom”.

These options many decrease your system visual effects but increase your system performance.

Automatic updates:-

Even though your system is geniune better to turn off your Automatic updates.There are many reasons
which slow down your processor speed if you turn on Automatic updates.few reasons are:-

1)Most of your RAM speed is used by Xp Operating System.If the resources of your XP is increased then Operating
System may slow down.It indirectly effects the processor speed.
2)If your click on Live Up dates then there may be chances of Virus entering in your system.which leads your
processor speed slow.

Defragmentation:-
This is the major step which increases your Processor speed.
Steps to perform Defragmentation
1)Go to my computer.
2)Right click on C drive. Click on proporties.
3)Choose the option Defragment now.

Removing virus:-
Virus such as Trojan,vorm.exe,sass.exe etc which slow down your processor speed.So download any good antivirus software such as Norton,Spyware terminator,Kaspersky etc.I would perfer Kaspersky it is a best antivirus software.Norton may slow down your system performance.

Few months ago i posted a topic on Internet speed.Several ways to increase Internet speed.
Increase your Bandwidth by 20% Windows uses 20% of your bandwidth! Get it back..

Sunday 15 July 2012

How to know who used your PC/Laptop in your absence

                                    How to know who used your PC/Laptop in your absence


Now easily find out, who used your PC/Laptop in your absence, without using any software.
Just follow these simple steps:

start >> run >>eventvwr.msc

Events are stored in three log files: Application, Security, and System.
These logs can be reviewed and archived.
For our purposes we want the System log. Click on "System" in the left-hand column for a list of events.
Look for a date and time when you weren't home and your computer should have been off.
Double click on the eg: info n it will show u the detail.
You can also use this log to see how long someone was on the computer. Just look at the time the computer was turned on and off for that day.

Saturday 14 July 2012

Receive Free SMS Alerts Whenever a new Mail Popped Up in Gmail via way2sms


All of you have heared the name of WAY2SMS ,Do you know that you can get SMS alerts when you receive a new email in your Gmail inbox? Yes, this can be done using way2sms.com Way2SMS.com. This facility which is provided by way2sms is extremely useful for people who don’t have a smartphone or when no internet connection is available.
  
How to Configure Gmail SMS Alerts?
  •     Login to your Way2SMS account (or) Sign Up if you don’t have one.
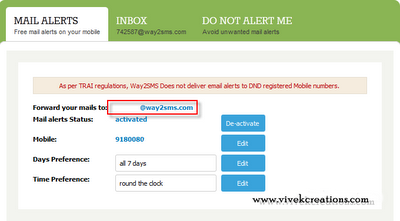
  •     Go to “Mail Alerts” tab and copy the mail forwarding address
Receive Free SMS Alerts Whenever a new Mail Popped Up in Gmail via way2sms

  •  Now, login to your Gmail account and select “Settings”.
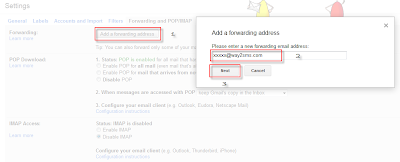
    Select the “Forwarding and POP/IMAP” tab and choose “Forward a copy of incoming mail to” option and enter the forwarding address that you’ve copied in the 2nd step.
Receive Free SMS Alerts Whenever a new Mail Popped Up in Gmail via way2sms
  •      Ensure you select the “Keep Gmail’s copy in the inbox” option.
  •     Confirm with the verification code that you’ll receive on your mobile in Gmail verification box.
That’s it! You’ll now receive mobile SMS alerts for every incoming mail that your Gmail ID gets.

NOTE: You can try this procedure with any Email service provider that allows mail forwarding service.

Tuesday 10 July 2012

How to hide facebook friend list

Many peoples asked me daily, that please help me to "Hide my friend list from other". So finally, here is the full tutorial by which you can change the privacy of your friend list. You can show your friend list in public, and you can easily able to hide it or change privacy only to you.

Well lets start. I will reveal the trick for new timeline users, but you can hide your friends in old view by same process.

  1. Goto your profile.
  2. Click on your friends.
  3. Then on Top Right, Click on Edit.
Facebook friends edit option

      4. After click. These all options will be display.

Facebook friend list privacy options

    5. Change your privacy from Public to Only Me. And your friend list will be hide from others.


How to install Windows 7, Windows 8 and Vista using pen drive


Requirements: 

*USB Flash Drive (Minimum 4GB)

*Windows 7 or Vista installation files.
Follow the below steps to create bootable Windows 7/Vista USB drive using which you can
install Windows 7/Vista easily.

1. Plug-in your USB flash drive to USB port and move all the contents from USB drive to a safe location on your system.

2. Open Command Prompt with admin rights. Use any of the below methods to open Command Prompt with admin rights.

*Type cmd in Start menu search box and hit Ctrl+ Shift+ Enter.

Or 

*Go to Start menu > All programs > Accessories, right click on Command Prompt and select Run as administrator.

3. You need to know about the USB drive a little bit. Type in the following commands in the command prompt:

First type DISKPART and hit enter to see the below message.


Next type LIST DISK command and note down the Disk number (ex: Disk 1) of your USB flash drive. In the below screenshot my Flash Drive Disk no is Disk 3.

4. Next type all the below commands one by one. Here I assume that your disk drive no is “Disk 3”.If you have Disk 2 as your USB flash drive then use Disk 2. Refer the above step to confirm it. So below are the commands you need to type and execute one by one:


SELECT DISK 3  
CLEAN 
CREATE PARTITION PRIMARY 
SELECT PARTITION 1 
ACTIVE 
FORMAT FS=NTFS 
(Format process may take few seconds)
ASSIGN 
EXIT 

Don’t close the command prompt as we need to execute one more command at the next step. Just minimize it.


5. Next insert your Windows7/Vista DVD into the optical drive and check the drive letter of the DVD drive. In this guide I will assume that your DVD drive letter is “D” and USB drive letter is “O” (open my computer to know about it).

6. Maximize the minimized Command Prompt in the 4th step. Type the following command now:

D: hit enter.
CD BOOT and hit enter.

Where “D” is your DVD drive letter.

7. Type another command given below to update the USB drive with BOOTMGR compatible code.

BOOTSECT.EXE /NT60 O: 


Where “O” is your USB drive letter. Once you enter the above command you will see the below message.

8. Copy your Windows 7/Vista DVD contents to the USB flash drive.

9. Your USB drive is ready to boot and install Windows 7/Vista. Only thing you need to change the boot priority at the BIOS to USB from the HDD or CD ROM drive. I won’t explain it as it’s just the matter the changing the boot priority or enabling the USB boot option in the BIOS.

Note: If you are not able to boot after following this guide means you haven’t set the BIOS priority to USB. If you got any problem in following this guide feel free to ask questions by leaving comment.

You can install windows 8 similarly using pendrive