Showing posts with label Red Hat. Show all posts

Friday 9 March 2012

Best Linux Distributions

What is the best linux distribution for you ?

There are various approaches to answering this question. The broad answer is: "any of them," but that's not very helpful if you're just looking for a place to start.

The problem is, there never can be one best Linux distribution for everyone, because the needs of each user tend to be unique. Telling someone who's looking for a good introductory distribution to try Gentoo, for instance, would be a mistake because for all its positive qualities, Gentoo is decidedly not a beginner's distro.

All too often, Linux aficionados will tend to list the distributions they like as the best, which is fair, but if they are not aware of their audience, they could suggest something that does not meet that person's needs. Finding a good Linux distribution is like finding a good match in an online dating service: good looks aren't the only quality upon which to judge a Linux distro.

To help users discover the Linux distribution that's best for them, this resource will definitively list the best candidates for the various types of Linux users to try. The use-case categories will be:
  • Best Desktop Distribution
  • Best Laptop Distribution
  • Best Enterprise Desktop
  • Best Enterprise Server
  • Best LiveCD
  • Best Security-Enhanced Distribution
  • Best Multimedia Distribution
Best Linux Desktop Distribution

There are a lot of Linux distributions that have the primary focus of becoming the next best desktop replacement for Windows or OS X. Of all the categories in this list, this is the most sought-after, and contentious, group of distros.

While it would be ideal to include many distributions on this list, the reality is that there really needs to be just one "best" Linux distribution. For early 2010, that distro has to be Canonical's Ubuntu.

linux distros- Ubuntu

Ubuntu edges out its closest contenders, Fedora and openSUSE, because its development team is constantly focused on the end-user experience. Canonical and the Ubuntu community have spent a lot of time and resources on bringing ease-of-use tools to this distribution, particularly in the area of installing Ubuntu and installing applications within Ubuntu.

In addition, Ubuntu's level of support for its desktop products is highly superior, which is important in this class of distributions since it is the most likely to contain users new to Linux. Both the official and unofficial Ubuntu documentation is robust and searchable, a big plus.

Best Linux Laptop Distribution

Laptop distributions almost fall into the same category as desktop users, but there are a number of key differences that make the criteria for evaluating a good laptop distribution important. Power management, docking tools, and wireless ease-of-use are critical to users on the go, as is having a distro that meets those needs.

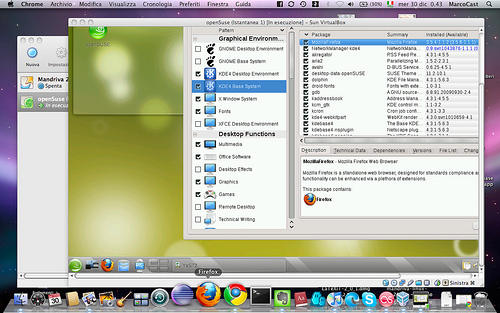
Right now, the best laptop distribution is openSUSE, one of the lead contenders for the desktop honors. On the laptop, openSUSE shines with great connectivity tools, such as an easy-to-use networking toolset that not only handles WiFi connectivity, but also CDMA/cellular modem connections.

best linux distros

openSUSE also deals with docking stations for laptops very well, including dual-monitor management on the fly. Power management is very granular, which is great for detailing various power needs you might find yourself needing.

Best Linux Enterprise Desktop

This category is replete with great contenders as well, and it's difficult to highlight just one. At the end of the day, though, the nod must be given to SUSE Linux Enterprise Desktop (SLED).

linux distros SLED

The reason is simple: while SLED and its primary competitor Red Hat Enterprise Linux Desktop are nearly identical in features and support performance, SLED has the advantage of the openSUSE Build Service, a free and open service that lets applications be built and delivered to SUSE Linux and openSUSE products (as well as Red Hat and CentOS).

This is a very important differentiator in enterprise desktop development, as it means that SLED has the current advantage of application building and deployment in the enterprise arena.

Best Linux Enterprise Server

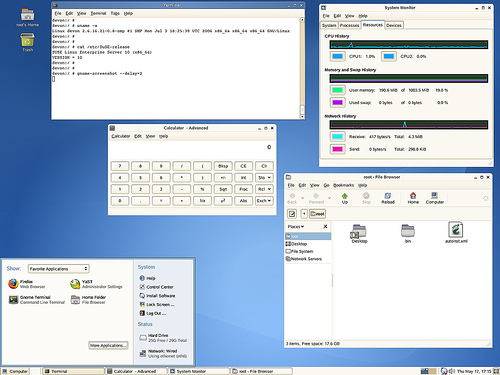
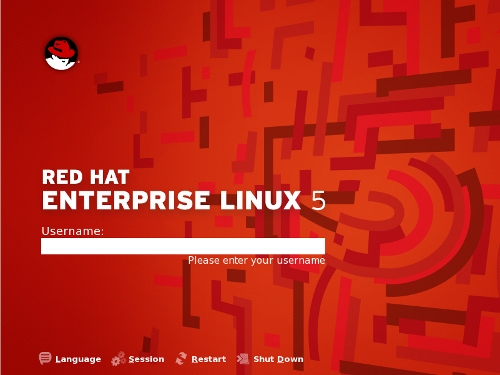
Again, in this category it really comes down to two main contenders: Red Hat Enterprise Linux (RHEL) and SUSE Linux Enterprise Server (SLES). Given the pick for the Enterprise Desktop category, you might expect SLES to get the "best of" label here.

But, when all factors for the enterprise server are weighed, RHEL is still the king of this particular hill.

Best Distros Red Hat

Red Hat edges out Novell with its server product, because RHEL users get a deeply mature distribution, and Red Hat's support structure is second to none in the enterprise channels.

Best Linux LiveCD

As Linux technology improves, users can easily choose the LiveCD version of practically any of the Linux distros listed here to get the best LiveCD experience for their needs.

There is a specialized class of LiveCDs, however, that offers users utilities and tools for the specific purpose of repairing existing Linux and Windows installations. These distros are very useful to have regardless of what primary Linux distribution you like to use, because in a crisis they are invaluable to own.

In this class of distribution, KNOPPIX is hands-down the most complete and useful distro. Loaded on a CD or USB storage device, KNOPPIX will let you recover from nearly any rare Linux system crash as well as the much-less-rare Windows breakdowns.

Best Distros KNOPPIX

Best Linux Security-Enhanced Distribution

Linux is inherently very secure compared to other operating systems, but there's always room for improvement.

One of the challenges for locking down Linux is if you are not careful, you can take away too much functionality. Another challenge is that the best security-oriented Linux distro, SELinux, is historically known to be difficult to configure correctly. Still, if security out of the box is your priority, this is the best place to begin.

Another approach is the white hat method: using security and forensic tools to examine your existing installation, determine the holes, then lock your system down based on what gaps you find. If you have the time and inclination, this is a great way to do it, because this will get any existing system more secure right away.

For the white hat approach, the best distribution is BackTrack Linux, a dedicated penetration testing distro that will enable you to safely try to crack any system you are caretaking. Its toolset and strong community give it the advantage in this category.

Best Distros Back Track

Best Linux Multimedia Distribution

General Linux distributions have come a long way in terms of multimedia performance. Rare is the audio or video file that can't be played on Linux. Music services such as Rhapsody and video sites like YouTube and Hulu are also standards-compliant and accessible to Linux users.

Still, for those users who are multimedia creators as well as consumers, there are Linux distributions that contain powerful tools for audio and video editing.

The best in this class is currently Ubuntu Studio. For audio, video, and graphic production, it contains a very complete set of tools, as well as format and codec support for a huge range of multimedia formats.

Best Distros Ubuntu Studio

The applications contained in Ubuntu Studio are the same or similar to those used by major studios to create cutting edge work, so users are getting the best apps, coupled with the strong support ethos already found in the Ubuntu community.

In Linux there are as many opinions as there are lines of code. This represents one view of the best in Linux. Select yours.

Monday 6 February 2012

How to speed up internet without any software | Full Tutorial

How to speed up internet without any software | Full Tutorial

Well in my this creation i will teach you, how to speed up your internet without any software. Its just a game of registry edit.

Yeah you can speed up you net by this tutorial. So lets start how it works and what you need to do :)

For Windows 2k/XP

1. First, open the Windows Registry using Regedit, and (after backing up) navigate to:

HKEY_LOCAL_MACHINE\SYSTEM\CurrentControlSet\Services\Tcpip\ServiceProvider

2. Note the following lines (all hex dwords):

Class = 008 ( biggrin.gif - indicates that TCP/IP is a name service provider, don't change
LocalPriority = 1f3 (499) - local names cache
HostsPriority = 1f4 (500) - the HOSTS file
DnsPriority = 7d0 (2000) - DNS
NetbtPriority = 7d1 (2001) - NetBT name-resolution, including WINS

3. What we're aiming to do is increase the priority of the last 4 settings, while keeping their order. The valid range is from -32768 to +32767 and lower numbers mean higher priority compared to other services. What we're aiming at is lower numbers without going to extremes, something like what's shown below should work well ;)

4. Change the "Priority" lines to:

LocalPriority = 005 (5) - local names cache
HostsPriority = 006 (6) - the HOSTS file
DnsPriority = 007 (7) - DNS
NetbtPriority = 008 ( biggrin.gif - NetBT name-resolution, including WINS

5. Reboot for changes to take effect.


For Windows 9x/ME

1. The tweak is essentialy the same as in Windows 2000/XP, just the location in the Registry is slightly different. For a more detailed description see the Windows 2000/XP section above

2. Open the Windows Registry using Regedit, and (after backing up) navigate to:

HKEY_LOCAL_MACHINE\System\CurrentControlSet\Services\VxD\MSTCP\ServiceProvider

3. You should see the following settings:
Class=hex:08,00,00,00

LocalPriority=hex:f3,01,00,00
HostsPriority=hex:f4,01,00,00
DnsPriority=hex:d0,07,00,00
NetbtPriority=hex:d1,07,00,00

4. The "priority" lines should be changed to:

LocalPriority=hex:05,00,00,00
HostsPriority=hex:06,00,00,00
DnsPriority=hex:07,00,00,00
NetbtPriority=hex:08,00,00,00

5. Reboot for changes to take effect


System.ini IRQ Tweak - Windows 9x/ME ONLY

1. Find your Network Card's IRQ

1. In order to add the entry to your System.ini file, you'd first have to find your NIC's IRQ

2. Right-click on My Computer icon on your Desktop, then left-click on Properties (a shortcut for that would be to press the 'Windows' + 'Pause' keys). Navigate to Device Manager and double-click on Computer. Under "View Resources" you will find a list of IRQs, each with description of the device that's using it. Note the IRQ number used by your Network Adapter

2. Adding the entry to System.ini

1. Once you've found the IRQ of your Network Card, you need to reserve some RAM for its use, by adding an entry to the System.ini file. You can edit the file in any text editor, however the easiest way is to use Windows' built in "System Configuration Editor"

2. Navigate to Start > Run and type sysedit . Find the [386enh] Section in the System.ini file and add Irq[n]=4096 under it, where [n] is the IRQ number of your NIC and 4096 is the amount of RAM you want to reserve in Kbytes. We recommend using 4096, however you can experiment with different values if you want. Save changes in the file, exit and reboot for changes to take effect.

Note: If you choose to try different values, keep in mind that reserving too much RAM for your NIC will decrease the amount of RAM available for applications, while reserving too little might not give the desired effect. It is the one of the great creativity of Vivek Creations Now some additional thoughts.


3. Additional Thoughts


1. The only negative effect of the System.ini IRQ tweak is that it will reduce the amount of RAM available for running applications a bit, by reserving some specifically for your Network Card's use. The gain in performance usually outweighs the negative effect by far, considering any Computer with 32Mb of RAM or more

2. This tweak may or may not work for you. It is not a documented tweak by Windows

3. Keep in mind that if you add hardware to your system the IRQ of the Network Adapter might change, in which case you will need to modify the setting in System.ini

4. In systems with multiple NICs, you might want to add the setting for both IRQs. Also, you could reserve RAM for other IRQs if you wish, just use common sense and don't forget it reduces the amount of RAM available for running applications

5. If you are using an USB device, it does not have a specific IRQ, however you can try adding the entry using the IRQ of the USB Controller

6. For internal Cable Modems, you'd have to add the entry using the IRQ of your modem, rather than the IRQ of a Network Card.


RESULTS WILL VARY


No matter how good your systems may be, they're only as effective as what you put into them. Enjoy my creations and keep yourself updated here for more interesting tutorials.
Do you want more tutorials related to Windows or Registry ?
If you want to read them all then simply Click Here


Sunday 5 February 2012

How to install Perl Module using CPAN

Install Perl Module using CPAN


At times, we need to install Perl modules that are not found in the official repository of a distribution. In that case, we have to revert to using cpan. CPAN stands for Comprehensive Perl Archive Network. It is an archive of over 16,000 modules of software written in Perl, as well as documentation for it. This tutorial will show you how to install a module using CPAN.

First we need to launch cpan. Type cpan in a terminal. If it is not already configured, then it will start to ask a series of questions. Just press Enter all the way until it asks for your location. Specify the location by entering the number for that location in the list shown. Then it will ask about your country, go ahead and type the number appropriate for your country. At the end you will see the cpan prompt like so


cpan>

To install a module, for example, Cache::Static, type the following at cpan prompt

cpan>install Cache::Static

It will ask you some questions, just press Enter to accept the defaults which almost always work. The module with all its dependencies will be downloaded, compiled and installed.

When you get back the cpan prompt, the module is installed.
Type quit to get out of cpan

cpan>quit

To confirm that the module is installed successfully, run this command

perl -e "use Cache::Static"

If you get no output, it means the module is installed successfully.

If you see the error “/bin/sh: cc: command not found”, then gcc is not installed. Install it like this on Debian, Ubuntu

aptitude install gcc

On Red Hat, Centos, Fedore, the following will work

yum install gcc

Finding MAC addresses of all devices in LAN

Finding MAC addresses of all devices in LAN

As simple my last creation How to share a directory using nfs my todays creation How to find MAC addresses of all devices in LAN is also very usefull and simple. Actually its just a sharing ;)

Recently I had to find mac addresses of all servers in the local area network (LAN) for preseeding Debian installations using PXE (I will soon write about it). Finding them is easy with nmap

I used the following command and I had the mac addresses along with their associated IPs of all devices in the LAN. To find mac addresses, nmap must be run as root

nmap -sP 192.168.2.*
Starting Nmap 4.11 ( http://www.insecure.org/nmap/ ) at 2010-03-31 12:39 EDT
Host 192.168.2.1 appears to be up.
MAC Address: 00:02:B3:40:E0:AA (Intel)
Host 192.168.2.2 appears to be up.
MAC Address: 00:02:B3:40:E0:A5 (Intel)
Host 192.168.2.3 appears to be up.
MAC Address: 00:02:B3:40:E0:A5 (Intel)
Host 192.168.2.11 appears to be up.
MAC Address: 00:1B:2F:6B:B7:AC (Unknown)
Host 192.168.2.34 appears to be up.
MAC Address: 00:1F:C6:C9:A7:54 (Unknown)
Host 192.168.2.39 appears to be up.
MAC Address: 00:17:A4:93:59:EF (Global Data Services)
Host 192.168.2.50 appears to be up.
MAC Address: 00:1E:8C:04:A5:1F (Unknown)
Host 192.168.2.57 appears to be up.
MAC Address: 00:05:5D:E0:32:DF (D-Link Systems)
Host 192.168.2.71 appears to be up.
MAC Address: 00:03:47:A9:F3:D1 (Intel)
Host 192.168.2.79 appears to be up.
MAC Address: 00:1C:C0:9D:7F:9D (Unknown)
Host 192.168.2.80 appears to be up.
MAC Address: 00:1C:C0:9D:7D:51 (Unknown)
Host 192.168.2.82 appears to be up.
MAC Address: 00:15:58:32:5C:F4 (Foxconn)
…..

How to share a directory using nfs


Share directory using nfs

This creation will walk you through exporting a directory so that we can read from or write to it. I will make it really simple so that in emergency situations, you are good to go within a few minutes

First install nfs server (I am on Debian 5.0, other distributions would have a the nfs package name similar to that)

aptitude install aptitude install nfs-kernel-server

After we have the nfs server installed, you need to export the directory by using the /etc/exports file. The format of the file is:

dir_to_be_exported allowed_hosts(options)

I am just about to export my home dir and allowing only 192.168.2.10 to mount it, so in /etc/exports, I would the following:

/home/linuxgravity 192.168.2.10(rw,sync,no_subtree_check)

That’s it. That was so easy, isn’t it.

Restart nfs server:

/etc/init.d/nfs-kernel-server restart

Now it is time for us to mount the shared (exported) directory to mount it on an empty directory. So while in the 192.168.2.10, first we would create a directory

mkdir /home/remote_home

Now just mount it with the following magically command:

mount 192.168.2.2:/home/linuxgravity /home/remote_home

As you have already figured out, the format is mount nfs_server_ip:exported_dir mount_point

And now you can just read from/write to /home/remote_home easily.

The whole process takes only less than two minutes ;)

ssh passwordless authentication without keys

ssh passwordless authentication without keys

Imagine ever wanted to avoid the hassle of typing in the password while connecting to servers using ssh? Here is a really simply neat trick that will demonstrate how easy it is to accomplish it so it does not ask for password. And as a bonus, you will notice that the connection is surprisingly much faster than you originally thought. No, it is not about ssh keys.

Suppose you could control the master which would permit you to enter the door without a key and the path it takes is always the right hand path. While you are thinking about it and saying to yourself what it has to do with ssh, allow me to tell you that you will realize once you have read the whole article how it is going to help you a lot in understanding passwordless authentication using this method.

The first thing we need is simply two lines in .ssh/config inside your home directory. If the file is not there, just create it. So the two magic lines are:

ControlMaster auto
ControlPath ~/.ssh/master-%r@%h:%p

Now connect to any host and it will ask for password. What the heck? It still asks for password, I heard you saying. That’s alright. Just put in the correct password and leave that terminal open. Open another terminal and try to connect to the same host again as in the first terminal and voila the magic…

While you are thinking about how just two key words ControlMaster and ControlPath allowed you to connect to a host without password and also much faster, let me throw in another neat trick.

If you ever wanted not to have to open another terminal, simply connect as shown below and the ssh will go into background

ssh -N -f host


Enjoy Vivek Creations :)

How to Undo a Sent Email in Gmail


Gmail is one of the biggest email service provider of Google. It gives you a vast memory of storage of above 7.49 GB during the time of writing this post. In mobiles we communicate via SMS for free of cost like wise in internet we send emails to communicate to others for free of cost. Basically every internet user owns his private email id. It’s natural that every human makes a mistake. But sending an email with mistakes might cause a problem anytime.

So, Gmail has a feature of undoing a sent email. By oversight or unintentionally if you send an email you can undo it in Gmail and the email will be saved in drafts and can be corrected and resend it again or you can trash that email. Undo is sudden option which can only be used when you accidentally send an email to others by mistake.


Steps to Undo a Sent Email in Gmail

1. Log in to your Gmail account. Now click on settings icon which you can find in left top bar. If not go to mail settings in old user interface and then you can find settings in that menu.

Undo a Sent Email in Gmail

2. Now in settings menu you can see the ‘Labs’ option click on it. Now you will find a normal search bar where you can type anything you want in that search bar.

Undo a Sent Email in Gmail

3. Now make a simple search for “Undo Send” extension in labs. You will find a cool Gmail Beta Plugin which helps in you in undoing a sent email by mistake in Gmail, now as soon as you Enable it and click on Save your Mail settings. Refresh your page otherwise Gmail will automatically load again so that plugin could start working in your account.

Undo a Sent Email in Gmail

4. Now just refresh the page of Gmail to see that Gmail Beta plugin in action.

5. Now you can try once by sending an email to anyone. Go to compose email or just click on any email and select the reply option in that email. Fill the spaces you want to send email and then click on Send, now you will see email sent and you will find a small Undo Option besides it to get that email back, click that and you email will be backed up in Drafts for future use. You can edit that email and resend it or you can trash that email if you don’t want it for further use.

Undo a Sent Email in Gmail

This feature has been introduced in Gmail since long time but yet many are still unaware of this. Don’t forget to reload the page or refresh your Gmail account once after enabling this. So, now you are not lagging behind with any new Gmail features. Now there is no word of mistake in your Gmail history.


How to Send mails from command line

Send mails from command line

Often times, we want to send log files or other emails from command line or want to script them. In this tutorial, I will show you how to do that using two mail clients mail and mutt.

Sending mails using mail:

mail (mailx is the newer version) is a fantastic program that can be used for sending email from command line or from within scripts.


The following example will send an email to admin@example.com, with subject “Apache is down” and text “Please check Apache at host name of the server”

echo “Please check Apache at `hostname`” | mail -s “Apache is down” admin@example.com


We can cat the contents of any text file, for example, log file and it will be sent to the recipient specified

cat “/var/log/apache2/error.log” | mail -s “Apache is down” admin@example.com

To attach a file, other than a text one, we need to uuencode (unix to unix encode) it before sending

uuencode banner.jpg banner_out.jpg | mail webmaster@example.com

The banner.jpg is the name of input file and banner_out.jpg is the output uuencoded file that we will be sent by mail.

To have text sent alogwith the attachment, we can cat or echo that text too

(cat /var/log/apache2/error.log;uuencode banner.jpg banner.jpg) | mail -s pic webmaster@example.com


Sending mails from using mutt:

With mutt, its same as using mail.

echo “Please check Apache at `hostname`” | mutt -s “Apache is down” admin@example.com

or we can cat the contents of a text file to show as body text

cat /var/log/apache2/error.log | mutt -s “Apache is down” admin@example.com

OR

mutt -s “Apache is down” admin@example.com

To send an empty body mail, use an empty line as the mail body:

echo | mutt -s “Software upgrades for `hostname`” admin@example.com

To attach a binary file, its even easier with mutt, just use the -a option

echo | mutt -s “New logo for the company” -a logo.gif webmaster@example.com

Hope you this creation added to your knowledge.