Showing posts with label Windows Tricks. Show all posts

Sunday, 30 September 2012

After Angry Birds Ravio's Bad Piggies Now In Market


After great success of Angry Birds, Ravio launched Bad Piggies, Here is the shot review of 
the latest launched game.

Ravio's Bad Piggies


Rovio, the game developer that created Angry Birds, is back with a new game. And this one stars the pigs — yes, the green smuggy foes of the angry birds — in the primary role. Rovio's last game, Amazing Alex, didn't really strike a chord with the gamers. It was not really a bad game but the gameplay relied too much on solving puzzle at the expense of fun. This is never a good thing.

With Bad Piggies, Rovio is returning back to its roots. Yes, there are puzzles in this game and it is significantly different than any Angry Birds game even if the familiar pigs are part of it. But still it is a game rooted in Angry Birds universe. The question is — Does it fly?

We find out...

Music, visuals and story

Story first. We all know that how the pigs salivate at the thought of eggs. They just can't keep themselves away from these eggs, even if it means going to war with the birds.

In Bad Piggies, the greedy green creatures are on an island. As usual they are after eggs. But to reach eggs, the pigs have to build various machines that allow them to pass obstacles or fly so that they can reach places high up on cliffs. This is where you, the player, come in. your job is to build the ultimate flying machine for the pigs from various parts that are available in the game.

Petri Jarvilehto, a senior executive with Rovio puts it like this: "Where Angry Birds was all about destruction, Bad Piggies is all about the joy of construction."

Bad Piggies is a pretty game. Given that it is set in a tropical island, there is lots of green foliage. If you have played any recent Angry Birds game, the visuals in Bad Piggies will make you feel at home. The visual style is same and the backgrounds are as detailed as Rovio makes them. However, the environment is not as destructible as it is in the Angry Birds games. The accompanying music is very good and compliments the gameplay very well.

Gameplay

Rovio set a very high benchmark with Angry Birds. It is a game easy to play and yet complex enough to challenge best players. It is casual and yet fun.

Bad Piggies aims to recreate the same magic, though with a different kind of gameplay. The puzzles in Bad Piggies are slightly more complex compared to those in Angry Birds. The task is to create good machines that pigs can use and to do that players have to carefully think about the role and placement of various items like a box, balloons, TNT and rockets etc. This is a little more difficult than flinging birds from a slingshot.

Another way in which the gameplay has changed is the way points are awarded. In Bad Piggies there is nothing to destruct. Instead the goal is to collect items. If you collect all the available items, you get three stars and if you complete the objective without collecting optional items, you get one star.

Bad Piggies is a lot of fun once you get the hang of tools and components available to you. But at the same time it is not Angry Birds. Primarily, there is one reason why many casual gamers who love Angry Birds may not like Bad Piggies. It is the nature of the game. Whether it is a good thing or bad, the truth is that as human beings we have more fun when we destroy things. Building things is a little tedious.

Angry Birds appeal to many of us because the objective is to flatten the fortification put up by the pigs! Smashing through the wooden planks, putting the black bird in between two stone pillars and killing the hidden pigs with a boom is immensely gratifying. Building flying machines has its own charm but it may not appeal to all.

Also, we did not like the new point system. Unlike the arcade-style point system in Angry Birds, where even destroying a flower yielded 50 or 100 points, in Bad Piggies all you get are stars. The arcade appeal is not there.

If you love playing casual games on your smartphone or tablet, you will likely spend hours with Bad Piggies. It's an enjoyable game, especially once you have crossed a few levels and are familiar with the way things work. Just don't expect it to be Angry Birds.

Available on...

iOS devices ( iPhone, iPod Touch, iPad), Android phones and tablets, Mac, and PC.

Cost
PC: $4.95
Mac: $4.99
iOS: $0.99 or $2.99 for HD version
Android: Free (ad-supported)

Thursday, 9 August 2012

Best 10 Free Screen Recording Softwares For Creating Screencasts


Mostly tutorials which are some hard to understand or complicated in writing skip by the peoples, because of text tutorials only. But if we create a proper video by capturing our computer/laptop screen and upload the video with the tutorial, then it will become more comfortable to your visitors. We can describe anything which we perform on our computer to anyone by just making a proper video of our actions. 
We use screencasting (screen recording) for making the video of our various tasks performed by us on our computer. By screen recording we can better describe/demonstrate our tutorial which is some how related to computer products or services. And by our screencasted video we can spread our tutorial in easy and fast way.
Today, I am going to share some great collection of screencasting (screen recording) software which are free to use and easy to handle. Here are the 10 best screen recording software.

CamStudio

CamStudio
CamStudio is an open source screen recorder software which can record every screen and audio activity on a computer & create industry-standard AVI video files or bandwidth-friendly Streaming Flash videos (SWF).
Operating system support: Windows

Jing

Jing Screen Recorder
Jing can both take screenshots & capture a screen as videos. It is possible to add textboxes, arrows or rectangles to highlight spots.
It can send the generated outputs to Screencast.com, Flickr, a FTP account, Twitter & more.
With a microphone, you can record audio with the video as well.
Operating system support: Windows, Mac OS X

Webineria

Webineria - Free Screen Capture
This is a very easy-to-use open source software to create screencasts.
It records the screen as an .AVI file & offers an option to create .FLV file from it. With the help of hotkeys, it is possible to start-pause & stop recording.
A great feature is, it can combine another video input (like webcam) with thescreen recording process.
Operating system support: Windows

Wink

Wink
Wink is a tutorial and presentation creation software which can capture screenshots & enables you to add explanation boxes, buttons, titles & more.
It supports various output formats like .EXE, .FLV, .HTML, etc.
Operating system support: Windows, Linux

UltraVNC Screen Recorder

UltraVNC Screen Recorder
UltraVNC Screen Recorder is based-on CamStudio source with updates to improve the performance.
It supports both audio & screen capturing.
Operating system support: Windows

Windows Media Encoder

Windows Media Encoder
Windows Media Encoder is a powerful application for capturing audio and video content with high-quality multichannel sound, high-definition video quality, and support for mixed-mode voice and music content.
Operating system support: Windows

BB FlashBack Express

BB FlashBack Express
BB FlashBack Express is the free version of some other advanced series. It can record from a video source, screen & audio.
It can export to AVI or FLV & has integrated support for direct uploading to the popular video sharing websites.
Operating system support: Windows

CaptureFox (Firefox add-on)

Firefox Screen Capture
CaptureFox is a Firefox add-on which can record screens frame-by-frame to create tutorials. It also supports audio recording.
Operating system support: All major operating systems

uTIPu TipCam

TipCam
TipCam, besides the standard screen recording with audio & video, has various features like:
  • has AVI & FLV support
  • audio can be re-recorderd
  • beginning & end parts can be trimmed
  • video can zoom to the mouse cursor with smart zooming
  • ability to draw free-style during recording
Operating system support: Windows

Krut

Krut Screen Recorder
This is a tiny Java application (works on many platforms) for creating screencasts.
Krut records movie files of selected parts of your screen in the quicktime mov format, including sound. The program has an intuitive and compact user interface.
Operating system support: All major operating systems

Tuesday, 31 July 2012

How to increase Processor Speed


There are many steps to increase your processor speed or system performance.
This post is for those people who are having problem with Processor speed. Follow the below steps carefully..
If you are using Microsoft Windows xp,then your processor speed may slow down.Why because Windows Xp carries extraordinary large list of unusual,visual sound effects,menu shadows,high resolution, quality color,fade effects and many.These features may slow down your Processor speed.


By decreasing your Xp resources,your Processor speed may definitely increase.


Firstly disable all the settings in Start up mode.
this can be done by following instructions :

1)Go to “Run”.
2)type “msconfig” in run.
3)Go to Start up.
4)Disable all startup items except Antivirus.

Prefetch files:-


delete all prefetch files.
1)go to run.
2)type prefetch.
3)delete all files.

If you are not having any with work with resolution better you restart your system in Safe Mode.This can be done by continuously by clicking F8 key more than 5times as soon as restart your system. Then a page will open with many options.Choose “Safe Mode“.If you want to do any Networking then choose
“Safe Mode with Networking“.

These two options may remove all your display,resolution,bit size settings etc.
But increase your system speed.

Visual effects:-

1)Right click on “My Computer” >Go to System proporties>Go to Advanced Settings
2)Then click on the Setting in Performance then choose the option”Adjust for best appearance”or you
can choose”custom”.

These options many decrease your system visual effects but increase your system performance.

Automatic updates:-

Even though your system is geniune better to turn off your Automatic updates.There are many reasons
which slow down your processor speed if you turn on Automatic updates.few reasons are:-

1)Most of your RAM speed is used by Xp Operating System.If the resources of your XP is increased then Operating
System may slow down.It indirectly effects the processor speed.
2)If your click on Live Up dates then there may be chances of Virus entering in your system.which leads your
processor speed slow.

Defragmentation:-
This is the major step which increases your Processor speed.
Steps to perform Defragmentation
1)Go to my computer.
2)Right click on C drive. Click on proporties.
3)Choose the option Defragment now.

Removing virus:-
Virus such as Trojan,vorm.exe,sass.exe etc which slow down your processor speed.So download any good antivirus software such as Norton,Spyware terminator,Kaspersky etc.I would perfer Kaspersky it is a best antivirus software.Norton may slow down your system performance.

Few months ago i posted a topic on Internet speed.Several ways to increase Internet speed.
Increase your Bandwidth by 20% Windows uses 20% of your bandwidth! Get it back..

Sunday, 15 July 2012

How to know who used your PC/Laptop in your absence

                                    How to know who used your PC/Laptop in your absence


Now easily find out, who used your PC/Laptop in your absence, without using any software.
Just follow these simple steps:

start >> run >>eventvwr.msc

Events are stored in three log files: Application, Security, and System.
These logs can be reviewed and archived.
For our purposes we want the System log. Click on "System" in the left-hand column for a list of events.
Look for a date and time when you weren't home and your computer should have been off.
Double click on the eg: info n it will show u the detail.
You can also use this log to see how long someone was on the computer. Just look at the time the computer was turned on and off for that day.

Tuesday, 10 July 2012

How to install Windows 7, Windows 8 and Vista using pen drive


Requirements: 

*USB Flash Drive (Minimum 4GB)

*Windows 7 or Vista installation files.
Follow the below steps to create bootable Windows 7/Vista USB drive using which you can
install Windows 7/Vista easily.

1. Plug-in your USB flash drive to USB port and move all the contents from USB drive to a safe location on your system.

2. Open Command Prompt with admin rights. Use any of the below methods to open Command Prompt with admin rights.

*Type cmd in Start menu search box and hit Ctrl+ Shift+ Enter.

Or 

*Go to Start menu > All programs > Accessories, right click on Command Prompt and select Run as administrator.

3. You need to know about the USB drive a little bit. Type in the following commands in the command prompt:

First type DISKPART and hit enter to see the below message.


Next type LIST DISK command and note down the Disk number (ex: Disk 1) of your USB flash drive. In the below screenshot my Flash Drive Disk no is Disk 3.

4. Next type all the below commands one by one. Here I assume that your disk drive no is “Disk 3”.If you have Disk 2 as your USB flash drive then use Disk 2. Refer the above step to confirm it. So below are the commands you need to type and execute one by one:


SELECT DISK 3  
CLEAN 
CREATE PARTITION PRIMARY 
SELECT PARTITION 1 
ACTIVE 
FORMAT FS=NTFS 
(Format process may take few seconds)
ASSIGN 
EXIT 

Don’t close the command prompt as we need to execute one more command at the next step. Just minimize it.


5. Next insert your Windows7/Vista DVD into the optical drive and check the drive letter of the DVD drive. In this guide I will assume that your DVD drive letter is “D” and USB drive letter is “O” (open my computer to know about it).

6. Maximize the minimized Command Prompt in the 4th step. Type the following command now:

D: hit enter.
CD BOOT and hit enter.

Where “D” is your DVD drive letter.

7. Type another command given below to update the USB drive with BOOTMGR compatible code.

BOOTSECT.EXE /NT60 O: 


Where “O” is your USB drive letter. Once you enter the above command you will see the below message.

8. Copy your Windows 7/Vista DVD contents to the USB flash drive.

9. Your USB drive is ready to boot and install Windows 7/Vista. Only thing you need to change the boot priority at the BIOS to USB from the HDD or CD ROM drive. I won’t explain it as it’s just the matter the changing the boot priority or enabling the USB boot option in the BIOS.

Note: If you are not able to boot after following this guide means you haven’t set the BIOS priority to USB. If you got any problem in following this guide feel free to ask questions by leaving comment.

You can install windows 8 similarly using pendrive


Monday, 9 July 2012

How to convert Windows 7 into Windows 8

New Tile-based Windows 8 is getting around the corner. But for those who like Tiles, Here are the few tools that can make their Windows 7 to the tiles. Special thanks toIntoWindows and One of my Online freind for finding and sharing some of these tools on their website.

Omnimo 4

Omnimo 4 is a Windows Phone 7 inspired multifunctional interactive desktopinformation center based on Rainmeter, a popular desktop customization platform. It turns your desktop into a productive and attractive workarea where delivers the information you need. Every interactive tile on the desktop gives you information at glance, and can be easily customized to your needs.
Omnimo 4 requires Rainmeter 2.0 or higher installed on your Windows 7 system first  before can be installed and configured.

Windows 8 looks

AeroTile

AeroTile is a free portable utility tools that adds an selective glassy aeroful tiles on your computer’s desktop. By using it, you have the choices choosing many of the options like My Computer, Control Panel, Fonts, My Documents, etc.
It’s a fairly easy to use tool. Simply download and extract the files from the zipped file, and launch it. Then, pick up the items you want them to show on your desktop in tile shape. The only downside is that you will have to manually organize those tiles to make them layout neatly.

Autotitle options list

Windows 8 icons

Mosaic (formally known as Metro Home 2)

Mosaic is an application that brings Metro UI to your desktop. It’s a set of widgets that displays in tile on your desktop showing the content from your local computer or from the Internet.


When the application is running, it shows a list of selective choices from the panel that stick to the right side of your desktop. Simply click to select them and it will immediately show on the desktop. Once on the desktop, you will be able to move them around just dragging and dropping to the grid predefined by the application.

Windows 8 home screen

Windows8Menu

Windows8Menu is a simple portable application that put the Windows 8 UI on top of Windows 7 desktop. It works just like any other application that you can simply launch and see what it offers. You can also customize the settings to show the stuff you would like to see.

Windows 8 customization

Zetro

Zetro is a Windows 8 metro UI style theme made for Windows 7. It brings the snazzy tiles to Windows 7. The Zetro theme takes a few steps to get Windows 7 ready to the tile, but it’s fairly easy to follow the instructions in the Readme file from the package. And because it’s a Theme pack, you can switch between Tiles and Aeros back and forth fairly easy.

Windows 8 themes

Sunday, 18 March 2012

How to fix Windows Counterfeit Error


Start Windows Registry editor and delete the folder "WGALOGON" located in the following location:

HKEY_LOCAL_MACHINE\SOFTWARE\Microsoft\ Windows NT\CurrentVersion\WinlogonNotify.

Delete all references in your registry to WgaTray.exe

Another alternative suggest that three files are installed Windows XP System Folder:

\WINDOWS\system32\WgaLogon.dll
\WINDOWS\system32\WgaTray.exe
\WINDOWS\system32\LegitCheckControl.dll

The wgatray.exe process makes the check for genuine windows software. You can disable WGA by removing the execute bit on WgaLogon.dll. That way, winlogon can't call it as a notification package at boot, and since WgaLogon is responsible for running and maintaining WgaTray.exe, no more tray popups either.

To change the execute bit of WgaLogon.dll, first turn off Simple File Sharing.
Now right click the file in Windows Explorer and open the Security Tab. Hit the Advanced button, uncheck the Inherit box at the bottom, hit the Copy button, then hit OK. Go through each listed user/group and remove the "Read & Execute" permission for that file, leaving the "Read" permission as-is.

Hit OK to apply the permission changes and close the file properties dialog. Restart the machine. You can now turn "Use simple file sharing" back on, if you want.

A third alternative posted on the internet suggest that users clear the content of file data.dat located in the following directory:
C:\Documents and Settings\All Users\Application Data\Windows Genuine Advantage\data

Save the data.dat empty file and change the attributes to "Read Only" - Restart you computer.
Or start your PC in Safe Mode and delete the following files from Windows system32 folder - wgalogon.dll spmgs.dll wgatray.exe The WGA setup file is in C:\WINDOWS\SoftwareDistribution\Download\6c4788c9549d437e76e1773a7639582

If you don't use "Fast User Switching", you can disable the Windows XP Welcome Screen if you are logged in as an Administrator. This will remove the initial WGA Warning Screen:

1. Click on Start -> Control Panel ->User Accounts
2. Click on "Change the way users log on or off"
3. Uncheck "Use the Welcome Screen" - Choose Apply
4. Close the User Accounts window and the Control Panel
5. The next time you reboot your computer, the classic login prompt will be used

To enable Fast User Switching, you must also enable the Use the Welcome screen option. Also, Fast User Switching cannot be used when Offline Files are enabled.

Disable wgatray.exe - Some users are claiming that removing the WGATray.exe (or killing the WGATray.exe process) are working for them.

None of these methods are guaranteed to work and people are just experimenting. Meanwhile Microsoft is not willing to relent to crackers this time and are planning to release an update of WGADiag2.exe utility in the next few days.

WGADiag2 will also fix the problem with registry key permissions may cause the installation of Windows Genuine Advantage Notifications KB905474 to fail from Windows Update:

Here's a manual fix provided by Microsoft. These permissions can be repaired using Registry Editor as follows:

1. Click Start, and then click Run
2. In the Open box, type regedit, and then click OK
3. Expand HKEY_CLASSES_ROOT
4. Locate the subkey HKEY_CLASSES_ROOT\LegitCheckControl.Legi…
5. Right-click the subkey and select Permissions….
6. Ensure that Administrators allowed Full Control permission
7. Repeat steps 3-6 for the subkey
HKEY_CLASSES_ROOT\LegitCheckControl.Le…

Microsoft has also published a kB article if the Windows Genuine Advantage (WGA) validation check process does not validate successfully on a Microsoft Windows XP-based computer, and you receive one or both of the following error messages:

Product Key Inaccessible 0x80080212

This problem occurs when you do not have the appropriate permissions for the Windows Genuine Advantage\Data folder. In the Permissions for Users section, make sure that Read & Execute, List Folder Contents and Read permissions are given. If the previous steps fail, start the computer in Safe Mode and rename the %allusersprofile%\Application Data\Windows Genuine Advantage directory.

Saturday, 11 February 2012

How To Mount A Hard Drive Automatically During Start up In Ubuntu


How To Mount A Hard Drive Automatically During Start up In Ubuntu


I do not know how many times I will ever receive requests such as “ Hello, how can I automatically mount a hard disk boot Ubuntu? ”. Finally I managed to find some ‘time to write this article I will show you the steps necessary to ensure that, in a completely automatic, power up your Ubuntu are also mounted hard drive or hard drive you need . Let’s start with a first method , longer and more cumbersome, but you will have full control of what you are doing. Open the terminal and type:

sudo mkdir / media / namepersonaldetails

Of course replace “ namepersonaldetails ” with a name to your liking. With this command we are not doing is create a directory under / media where we will mount our hard drive.Now comes the slightly more difficult to know the name of your HD (/ dev/sda2 / dev/sda3, etc.). You can do this from a terminal type the command:

sudo fdisk-l

or the command:

df-h

Now we have to edit the fstab file is a configuration file used to indicate which and how many drives loaded at boot time, with their options. Enter, therefore, the following command:

sudo nano / etc / fstab

and, at the end of the file, add:

/ Dev/sda3 / media / namepersonaldetails ntfs auto, rw, exec, users, dmask = 000, fmask = 111, nls = utf8 0 0

As you can see it, in this case, a HD with NTFS file system. To check that the HD is really mounted, type:

sudo mount-a

Another effective method , and very fast, is to create a small startup script. Type:

gedit ~ / mount.sh

and paste the following code:

# / Bin / sh 
gvfs-mount-d / dev / sdaX

Where, of course, instead of sdaX you need to put the id of your HD. Now granted execute permissions to this script:

chmod + x ~ / mount.sh

And add it to “ boot applications ”in Ubuntu. All very simple, do not you think?


    Monday, 6 February 2012

    How to speed up internet without any software | Full Tutorial

    How to speed up internet without any software | Full Tutorial

    Well in my this creation i will teach you, how to speed up your internet without any software. Its just a game of registry edit.

    Yeah you can speed up you net by this tutorial. So lets start how it works and what you need to do :)

    For Windows 2k/XP

    1. First, open the Windows Registry using Regedit, and (after backing up) navigate to:

    HKEY_LOCAL_MACHINE\SYSTEM\CurrentControlSet\Services\Tcpip\ServiceProvider

    2. Note the following lines (all hex dwords):

    Class = 008 ( biggrin.gif - indicates that TCP/IP is a name service provider, don't change
    LocalPriority = 1f3 (499) - local names cache
    HostsPriority = 1f4 (500) - the HOSTS file
    DnsPriority = 7d0 (2000) - DNS
    NetbtPriority = 7d1 (2001) - NetBT name-resolution, including WINS

    3. What we're aiming to do is increase the priority of the last 4 settings, while keeping their order. The valid range is from -32768 to +32767 and lower numbers mean higher priority compared to other services. What we're aiming at is lower numbers without going to extremes, something like what's shown below should work well ;)

    4. Change the "Priority" lines to:

    LocalPriority = 005 (5) - local names cache
    HostsPriority = 006 (6) - the HOSTS file
    DnsPriority = 007 (7) - DNS
    NetbtPriority = 008 ( biggrin.gif - NetBT name-resolution, including WINS

    5. Reboot for changes to take effect.


    For Windows 9x/ME

    1. The tweak is essentialy the same as in Windows 2000/XP, just the location in the Registry is slightly different. For a more detailed description see the Windows 2000/XP section above

    2. Open the Windows Registry using Regedit, and (after backing up) navigate to:

    HKEY_LOCAL_MACHINE\System\CurrentControlSet\Services\VxD\MSTCP\ServiceProvider

    3. You should see the following settings:
    Class=hex:08,00,00,00

    LocalPriority=hex:f3,01,00,00
    HostsPriority=hex:f4,01,00,00
    DnsPriority=hex:d0,07,00,00
    NetbtPriority=hex:d1,07,00,00

    4. The "priority" lines should be changed to:

    LocalPriority=hex:05,00,00,00
    HostsPriority=hex:06,00,00,00
    DnsPriority=hex:07,00,00,00
    NetbtPriority=hex:08,00,00,00

    5. Reboot for changes to take effect


    System.ini IRQ Tweak - Windows 9x/ME ONLY

    1. Find your Network Card's IRQ

    1. In order to add the entry to your System.ini file, you'd first have to find your NIC's IRQ

    2. Right-click on My Computer icon on your Desktop, then left-click on Properties (a shortcut for that would be to press the 'Windows' + 'Pause' keys). Navigate to Device Manager and double-click on Computer. Under "View Resources" you will find a list of IRQs, each with description of the device that's using it. Note the IRQ number used by your Network Adapter

    2. Adding the entry to System.ini

    1. Once you've found the IRQ of your Network Card, you need to reserve some RAM for its use, by adding an entry to the System.ini file. You can edit the file in any text editor, however the easiest way is to use Windows' built in "System Configuration Editor"

    2. Navigate to Start > Run and type sysedit . Find the [386enh] Section in the System.ini file and add Irq[n]=4096 under it, where [n] is the IRQ number of your NIC and 4096 is the amount of RAM you want to reserve in Kbytes. We recommend using 4096, however you can experiment with different values if you want. Save changes in the file, exit and reboot for changes to take effect.

    Note: If you choose to try different values, keep in mind that reserving too much RAM for your NIC will decrease the amount of RAM available for applications, while reserving too little might not give the desired effect. It is the one of the great creativity of Vivek Creations Now some additional thoughts.


    3. Additional Thoughts


    1. The only negative effect of the System.ini IRQ tweak is that it will reduce the amount of RAM available for running applications a bit, by reserving some specifically for your Network Card's use. The gain in performance usually outweighs the negative effect by far, considering any Computer with 32Mb of RAM or more

    2. This tweak may or may not work for you. It is not a documented tweak by Windows

    3. Keep in mind that if you add hardware to your system the IRQ of the Network Adapter might change, in which case you will need to modify the setting in System.ini

    4. In systems with multiple NICs, you might want to add the setting for both IRQs. Also, you could reserve RAM for other IRQs if you wish, just use common sense and don't forget it reduces the amount of RAM available for running applications

    5. If you are using an USB device, it does not have a specific IRQ, however you can try adding the entry using the IRQ of the USB Controller

    6. For internal Cable Modems, you'd have to add the entry using the IRQ of your modem, rather than the IRQ of a Network Card.


    RESULTS WILL VARY


    No matter how good your systems may be, they're only as effective as what you put into them. Enjoy my creations and keep yourself updated here for more interesting tutorials.
    Do you want more tutorials related to Windows or Registry ?
    If you want to read them all then simply Click Here


    How to resolve Adobe Photoshop Cs2 Data1 Cab error

    How to resolve Adobe Photoshop Cs2 Data1 Cab error


    What exactly is Adobe Photoshop Cs2 Data1 Cab error code?


    A Adobe Photoshop Cs2 Data1 Cab error is the number and letter data format of the error message prompted. This is the popular error code layout used by Windows along with other Windows compatible software and device driver manufacturers.

    This kind of computer code is required by the merchant to ascertain the error caused. This unique Adobe Photoshop Cs2 Data1 Cab error has a numeric value and a practical explanation. Sometimes the error could have extra variables in Adobe Photoshop Cs2 Data1 Cab data format .The further hexadecimal code will be the address of the memory regions where the instructions are stored at the time of the error message.

    The cause of Adobe Photoshop Cs2 Data1 Cab error?


    The Adobe Photoshop Cs2 Data1 Cab error message may be due to Windows system file damage. Broken system files are usually a real threat to the performance of your system.
    There can be numerous events which may cause file errors. An unfinished installation steup, a partial file erasure, bad erasure of applications or computer hardware. It can also be caused if the pc has caught a a virus or adware or spyware invasion or through an incorrect shutdown of the laptop or computer. Any of the previously mentioned activities may well end up in the deletion or corruption of Windows system files. A corrupted system file will lead to missing and erroneously connected data and archives necessary for the accurate working of the application.

    Guidelines on how to simply resolve Adobe Photoshop Cs2 Data1 Cab error message?


    The two main techniques to take care of Adobe Photoshop Cs2 Data1 Cab Error message:


    Advanced User Remedy (manual update):
    1) Start up the personal computer then log on as an admin.

    2) Click the Start button then select All Programs, Accessories, System, and next select System Restore.

    3) From the new window, select “Restore my personal computer to an earlier period” and after that click Next.

    4) Find the most up to date restore date in the “click a restoration point” list, then click Next.

    5) Click Next within the confirmation screen.

    6) Reboot the pc after the rescue is done.


    Beginner Remedy (completely automated):
    1) Download this (Adobe Photoshop Cs2 Data1 Cab) fix software program.

    2) Install software program and click on Scan button in the software.

    3) Hit the Repair Errors button when the scan is successfully done.

    4) Restart your computer system.

    Here is an alternative Adobe Photoshop Cs2 Data1 Cab repair tool you may use if the previous option doesn’t work.


    Wednesday, 25 January 2012

    How to Change Windows7 Login Screen.


    Hello Friends, Thanks for watching my first post on How to make folders as CON,AUX,NUL etc. in windows .Keep appreciating like this,it makes me more enthusiastic to share more tricks with you guys.
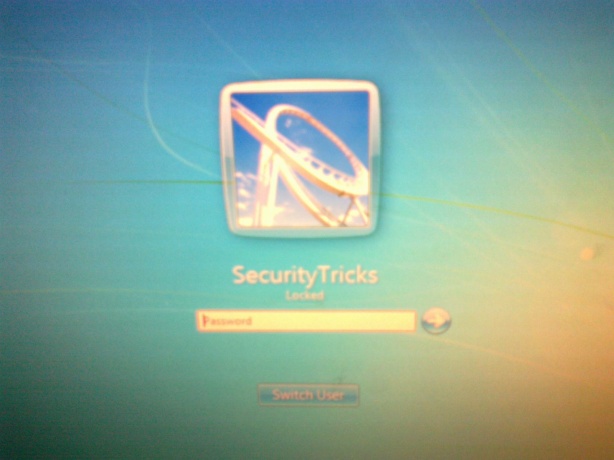
    Today i am going to share a trick on “How to Change Windows7  login screen” . Well commonly we have login screen as below —

       logonscreen_previous


    Well if want to customize it,you just have to follow simple steps below–
    Go to Start >Run >Type Regedit . i.e open registry editor.
    Now Go toHKEY_LOCAL_MACHINESOFTWAREMICROSOFTWINDOWSCURRENTVERSIONAUTHENTICATIONLogOnUIBackground
    Make a DWORD Value with the name OEMBackground and set its value to 1 .

    Then,Go to “SystemDrive:WindowsSystem32oobe” .
    Create a folder named “info”
    In ‘info’ create a folder named as ‘backgrounds”
    In ‘backgrounds’ put your desired login-screen file (better be in ‘.jpeg’ format ) with the name‘backgroundDefault’.
    One thing you need to keep in mind that size of this file should be less than ’256 kb’ otherwise windows won’t accept it as log-in screen.
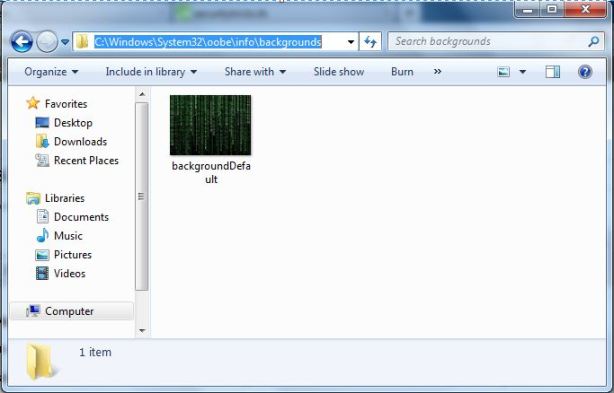
    Now whole path should be as as C: is System Drive –
    “C:WindowsSystem32oobeinfobackgroundsbackgroundDefault.jpeg”
    loginscreen_filelocation


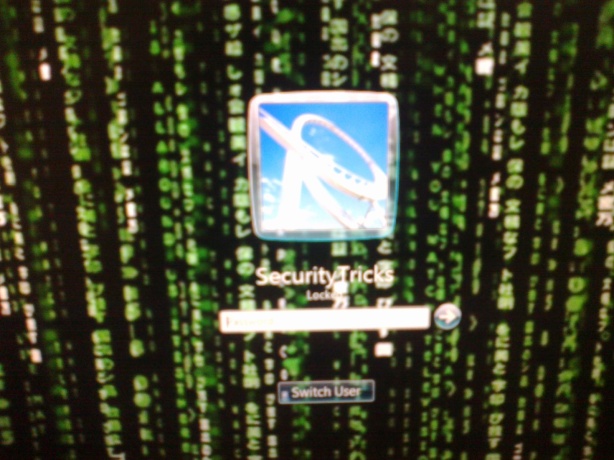
    Now the login screen changed to below one–
    logonscreen_new


    If you like this creation then you can share it with your friends. And for support you can ask in comments.

    How to lock a Folder without software

    We all know about the many folder lock software which are available on huge internet market. But they all are not much successful because of memory management but also if any of your friend just uninstall the soft then your all files will be open or will be currept.
    Todays i am going to share a creation which can hide a folder without software.
    Now whats new in this.
    Ok let read out the features :P

    Features

    • Free of Cost
    • Only a simple script it is
    • fast access
    • The special thing is, if you lock a folder with this and make the files hide. Then even DOS will be failed to seach your files ;)
    Yeah i know the last feature is much more intersting.
    Now how to use this creation.

    Steps:

    1. Open notepad and paste the following code in it.
    2. Change the password in code.

    On following ( Type your password here )
    Enter your password here.

    3. Save the notepad as: Locker.bat
    4. At first time start it will create folder with Locker automatically for u.
    5. After creation of Locker folder again click on the Locker.bat
    6. It will ask.press Y then Locker folder will be disappeared.
    7. Again to get it click on locker.bat. and give ur password u will get the folder again.


    Code:

    cls
    @ECHO OFF
    title Folder Locker
    if EXIST "Control Panel.{21EC2020- 3AEA-1069- A2DD-08002B30309 D}" goto UNLOCK
    if NOT EXIST Locker goto MDLOCKER
    :CONFIRM
    echo Are you sure u want to Lock the folder(Y/N)
    set/p "cho=>"
    if %cho%==Y goto LOCK
    if %cho%==y goto LOCK
    if %cho%==n goto END
    if %cho%==N goto END
    echo Invalid choice.
    goto CONFIRM
    :LOCK
    ren Locker "Control Panel.{21EC2020- 3AEA-1069- A2DD-08002B30309 D}"
    attrib +h +s "Control Panel.{21EC2020- 3AEA-1069- A2DD-08002B30309 D}"
    echo Folder locked
    goto End
    :UNLOCK
    echo Enter password to Unlock folder
    set/p "pass=>"
    if NOT %pass%==type your password here goto FAIL
    attrib -h -s "Control Panel.{21EC2020- 3AEA-1069- A2DD-08002B30309 D}"
    ren "Control Panel.{21EC2020- 3AEA-1069- A2DD-08002B30309 D}" Locker
    echo Folder Unlocked successfully
    goto End
    :FAIL
    echo Invalid password
    goto end
    :MDLOCKER
    md Locker
    echo Locker created successfully
    goto End
    :End
    11/19/07
    *Vicky verma
    See the 13th line from below.
    It is as follow

    if NOT %pass%==type your password here goto FAIL

    Enjoy Friends keep yourself updated for more this type of creations :)