Showing posts with label Windows 7. Show all posts

Sunday, 9 September 2012

Free Face Recognition Software for Windows 7 To Automatic Log in


Face Recognition Software for Windows 7

Now days technology is changing very rapidly and every day something new discovered. Now Login to windows 7 through Face Recognition using a web-cam is one of the enhancements; a lot of us experimenting. Not only this save our typing but also is a more secure way if very much conscious about the security issue.

If you are also using Windows 7 and do have a webcam attached to the pc then you can test this a very little and tiny application called Blink; which may enable you to  log in to windows just by looking into the webcam only for just a second and your account wil be logged? How this is made possible because of the free software BLINKby Luxand which employs the advanced face recognition technologies to provide automatic, quick and reliable log in to one or many computer users.
Luxand Blink! Software Logo


Windows 8 is expected to have an Android like pattern logon screen where users can set a password based on user patterns. That can turn worth while on touch screen devices and get rid of the boring text passwords. That being said Windows 7 users don’t have anything cool to boast about at least when at logon screen. Neither do we have pattern logon or facial recognition screen in stock OS. While pattern logon may hit Windows 7 in the form of third-party app soon (Developers! Developers!) here is a free facial recognition software add-on. 

This tool can be used as a free alternative to the commercially available “Fast Access” face recognition software that comes installed on many Dell laptops. Unlike Blink!, Fast Access being a premium product is feature rich.

Free Luxand Blink (Settings)


Click Here to Download

How To Make Bootable USB Pen Drive for Windows 7

Installing Windows from a USB flash drive has several advantages : 
First of all, the overall speed of the installation process will increase significantly, carrying a USB stick is much more convenient than a DVD, and finally it becomes possible to install the OS even on those systems that do not have a DVD drive, such as a netbook.

Win 7 setup by USB
 

In this post, I will show you how to load the Windows installation on to your USB flash drive and make it bootable just like the DVD.

There are Two Options:
1. Windows 7 USB-DVD Download Tool.
2. Basic Option.

1. Windows 7 USB-DVD Download Tool:
Just Download this Tool and Installed in your Desired PC then follow some easy Steps:-

or 

2. Basic Option:
Tools Required:
1. USB flash drive with a minimum capacity of 4 GB.
2. Windows 7 Setup DVD. 
Step 1 : Plug-in your USB flash drive.
Step 2 : Open the PowerShell (OR Command Prompt if PowerShell Not Exist). If you are using Windows 7/Vista then open it with administrator rights*.
* Goto Start -> All Programs -> Accessories ->Windows PowerShell ->  Right-click on “Windows PowerShell” and select “Run as Administrator”.
Step 3: In the PowerShell, type
DISKPART

This will start the Microsoft DiskPart utility as shown below:

Windows 7 Installation 

Now issue the following command:
LIST DISK

This will show you a list of  available disks on your system. Disk 0 is usually the hard disk. In my case, Disk 1 is the USB drive (this can be a different one in your case). Now issue the command as shown below:

Windows 7 Installation (List Disk) 

 SELECT DISK 1

Windows 7 Installation (Disk 1) 

above command, 1 is the USB drive number on my system. If you have a different number on your system, then you need to replace 1 with that number.
Step-4: Now issue the following list of commands one by one as shown below:

CLEAN
CREATE PARTITION PRIMARY
SELECT PARTITION 1
ACTIVE
FORMAT FS=NTFS QUICK
ASSIGN
EXIT

Windows 7 Installation (Disk Part Clean) 

Close Power Shell and proceed to the next step.

Step 5: Insert the Windows 7/Vista installation disc and note down the “drive letter” of your DVD drive. In my case, it is “H:”.

Win 7 icon in my computer 

Open the command  prompt. If you are using Windows 7/Vista then open it with administrator rights*.
* Goto Start -> All Programs -> Accessories -> Right-click on “Command Prompt” and select “Run as Administrator”.

Now type the following list of commands as shown below:
H:
CD BOOT
BOOTSECT.EXE /NT60 G:(NOTE:
G: is your USB drive letter)

EXIT

Windows 7 Installation (CMD) 

Step-6: Copy the contents of your Windows 7/Vista installation disk into the USB flash drive.
Directly Copy-Paste All DVD file into Usb Stick Then…

Your USB stick is now ready to boot and install the OS for you. Don’t forget to enable the “USB Boot” option and change the “Boot priority to USB device  from hard disk” in your BIOS settings.

Windows 7 Installation (Boot Priority) 

Thursday, 9 August 2012

Best 10 Free Screen Recording Softwares For Creating Screencasts


Mostly tutorials which are some hard to understand or complicated in writing skip by the peoples, because of text tutorials only. But if we create a proper video by capturing our computer/laptop screen and upload the video with the tutorial, then it will become more comfortable to your visitors. We can describe anything which we perform on our computer to anyone by just making a proper video of our actions. 
We use screencasting (screen recording) for making the video of our various tasks performed by us on our computer. By screen recording we can better describe/demonstrate our tutorial which is some how related to computer products or services. And by our screencasted video we can spread our tutorial in easy and fast way.
Today, I am going to share some great collection of screencasting (screen recording) software which are free to use and easy to handle. Here are the 10 best screen recording software.

CamStudio

CamStudio
CamStudio is an open source screen recorder software which can record every screen and audio activity on a computer & create industry-standard AVI video files or bandwidth-friendly Streaming Flash videos (SWF).
Operating system support: Windows

Jing

Jing Screen Recorder
Jing can both take screenshots & capture a screen as videos. It is possible to add textboxes, arrows or rectangles to highlight spots.
It can send the generated outputs to Screencast.com, Flickr, a FTP account, Twitter & more.
With a microphone, you can record audio with the video as well.
Operating system support: Windows, Mac OS X

Webineria

Webineria - Free Screen Capture
This is a very easy-to-use open source software to create screencasts.
It records the screen as an .AVI file & offers an option to create .FLV file from it. With the help of hotkeys, it is possible to start-pause & stop recording.
A great feature is, it can combine another video input (like webcam) with thescreen recording process.
Operating system support: Windows

Wink

Wink
Wink is a tutorial and presentation creation software which can capture screenshots & enables you to add explanation boxes, buttons, titles & more.
It supports various output formats like .EXE, .FLV, .HTML, etc.
Operating system support: Windows, Linux

UltraVNC Screen Recorder

UltraVNC Screen Recorder
UltraVNC Screen Recorder is based-on CamStudio source with updates to improve the performance.
It supports both audio & screen capturing.
Operating system support: Windows

Windows Media Encoder

Windows Media Encoder
Windows Media Encoder is a powerful application for capturing audio and video content with high-quality multichannel sound, high-definition video quality, and support for mixed-mode voice and music content.
Operating system support: Windows

BB FlashBack Express

BB FlashBack Express
BB FlashBack Express is the free version of some other advanced series. It can record from a video source, screen & audio.
It can export to AVI or FLV & has integrated support for direct uploading to the popular video sharing websites.
Operating system support: Windows

CaptureFox (Firefox add-on)

Firefox Screen Capture
CaptureFox is a Firefox add-on which can record screens frame-by-frame to create tutorials. It also supports audio recording.
Operating system support: All major operating systems

uTIPu TipCam

TipCam
TipCam, besides the standard screen recording with audio & video, has various features like:
  • has AVI & FLV support
  • audio can be re-recorderd
  • beginning & end parts can be trimmed
  • video can zoom to the mouse cursor with smart zooming
  • ability to draw free-style during recording
Operating system support: Windows

Krut

Krut Screen Recorder
This is a tiny Java application (works on many platforms) for creating screencasts.
Krut records movie files of selected parts of your screen in the quicktime mov format, including sound. The program has an intuitive and compact user interface.
Operating system support: All major operating systems

Tuesday, 10 July 2012

How to install Windows 7, Windows 8 and Vista using pen drive


Requirements: 

*USB Flash Drive (Minimum 4GB)

*Windows 7 or Vista installation files.
Follow the below steps to create bootable Windows 7/Vista USB drive using which you can
install Windows 7/Vista easily.

1. Plug-in your USB flash drive to USB port and move all the contents from USB drive to a safe location on your system.

2. Open Command Prompt with admin rights. Use any of the below methods to open Command Prompt with admin rights.

*Type cmd in Start menu search box and hit Ctrl+ Shift+ Enter.

Or 

*Go to Start menu > All programs > Accessories, right click on Command Prompt and select Run as administrator.

3. You need to know about the USB drive a little bit. Type in the following commands in the command prompt:

First type DISKPART and hit enter to see the below message.


Next type LIST DISK command and note down the Disk number (ex: Disk 1) of your USB flash drive. In the below screenshot my Flash Drive Disk no is Disk 3.

4. Next type all the below commands one by one. Here I assume that your disk drive no is “Disk 3”.If you have Disk 2 as your USB flash drive then use Disk 2. Refer the above step to confirm it. So below are the commands you need to type and execute one by one:


SELECT DISK 3  
CLEAN 
CREATE PARTITION PRIMARY 
SELECT PARTITION 1 
ACTIVE 
FORMAT FS=NTFS 
(Format process may take few seconds)
ASSIGN 
EXIT 

Don’t close the command prompt as we need to execute one more command at the next step. Just minimize it.


5. Next insert your Windows7/Vista DVD into the optical drive and check the drive letter of the DVD drive. In this guide I will assume that your DVD drive letter is “D” and USB drive letter is “O” (open my computer to know about it).

6. Maximize the minimized Command Prompt in the 4th step. Type the following command now:

D: hit enter.
CD BOOT and hit enter.

Where “D” is your DVD drive letter.

7. Type another command given below to update the USB drive with BOOTMGR compatible code.

BOOTSECT.EXE /NT60 O: 


Where “O” is your USB drive letter. Once you enter the above command you will see the below message.

8. Copy your Windows 7/Vista DVD contents to the USB flash drive.

9. Your USB drive is ready to boot and install Windows 7/Vista. Only thing you need to change the boot priority at the BIOS to USB from the HDD or CD ROM drive. I won’t explain it as it’s just the matter the changing the boot priority or enabling the USB boot option in the BIOS.

Note: If you are not able to boot after following this guide means you haven’t set the BIOS priority to USB. If you got any problem in following this guide feel free to ask questions by leaving comment.

You can install windows 8 similarly using pendrive


Monday, 9 July 2012

How to convert Windows 7 into Windows 8

New Tile-based Windows 8 is getting around the corner. But for those who like Tiles, Here are the few tools that can make their Windows 7 to the tiles. Special thanks toIntoWindows and One of my Online freind for finding and sharing some of these tools on their website.

Omnimo 4

Omnimo 4 is a Windows Phone 7 inspired multifunctional interactive desktopinformation center based on Rainmeter, a popular desktop customization platform. It turns your desktop into a productive and attractive workarea where delivers the information you need. Every interactive tile on the desktop gives you information at glance, and can be easily customized to your needs.
Omnimo 4 requires Rainmeter 2.0 or higher installed on your Windows 7 system first  before can be installed and configured.

Windows 8 looks

AeroTile

AeroTile is a free portable utility tools that adds an selective glassy aeroful tiles on your computer’s desktop. By using it, you have the choices choosing many of the options like My Computer, Control Panel, Fonts, My Documents, etc.
It’s a fairly easy to use tool. Simply download and extract the files from the zipped file, and launch it. Then, pick up the items you want them to show on your desktop in tile shape. The only downside is that you will have to manually organize those tiles to make them layout neatly.
Autotitle options list

Windows 8 icons

Mosaic (formally known as Metro Home 2)

Mosaic is an application that brings Metro UI to your desktop. It’s a set of widgets that displays in tile on your desktop showing the content from your local computer or from the Internet.


When the application is running, it shows a list of selective choices from the panel that stick to the right side of your desktop. Simply click to select them and it will immediately show on the desktop. Once on the desktop, you will be able to move them around just dragging and dropping to the grid predefined by the application.

Windows 8 home screen

Windows8Menu

Windows8Menu is a simple portable application that put the Windows 8 UI on top of Windows 7 desktop. It works just like any other application that you can simply launch and see what it offers. You can also customize the settings to show the stuff you would like to see.

Windows 8 customization

Zetro

Zetro is a Windows 8 metro UI style theme made for Windows 7. It brings the snazzy tiles to Windows 7. The Zetro theme takes a few steps to get Windows 7 ready to the tile, but it’s fairly easy to follow the instructions in the Readme file from the package. And because it’s a Theme pack, you can switch between Tiles and Aeros back and forth fairly easy.

Windows 8 themes

Sunday, 18 March 2012

How to fix Windows Counterfeit Error


Start Windows Registry editor and delete the folder "WGALOGON" located in the following location:

HKEY_LOCAL_MACHINE\SOFTWARE\Microsoft\ Windows NT\CurrentVersion\WinlogonNotify.

Delete all references in your registry to WgaTray.exe

Another alternative suggest that three files are installed Windows XP System Folder:

\WINDOWS\system32\WgaLogon.dll
\WINDOWS\system32\WgaTray.exe
\WINDOWS\system32\LegitCheckControl.dll

The wgatray.exe process makes the check for genuine windows software. You can disable WGA by removing the execute bit on WgaLogon.dll. That way, winlogon can't call it as a notification package at boot, and since WgaLogon is responsible for running and maintaining WgaTray.exe, no more tray popups either.

To change the execute bit of WgaLogon.dll, first turn off Simple File Sharing.
Now right click the file in Windows Explorer and open the Security Tab. Hit the Advanced button, uncheck the Inherit box at the bottom, hit the Copy button, then hit OK. Go through each listed user/group and remove the "Read & Execute" permission for that file, leaving the "Read" permission as-is.

Hit OK to apply the permission changes and close the file properties dialog. Restart the machine. You can now turn "Use simple file sharing" back on, if you want.

A third alternative posted on the internet suggest that users clear the content of file data.dat located in the following directory:
C:\Documents and Settings\All Users\Application Data\Windows Genuine Advantage\data

Save the data.dat empty file and change the attributes to "Read Only" - Restart you computer.
Or start your PC in Safe Mode and delete the following files from Windows system32 folder - wgalogon.dll spmgs.dll wgatray.exe The WGA setup file is in C:\WINDOWS\SoftwareDistribution\Download\6c4788c9549d437e76e1773a7639582

If you don't use "Fast User Switching", you can disable the Windows XP Welcome Screen if you are logged in as an Administrator. This will remove the initial WGA Warning Screen:

1. Click on Start -> Control Panel ->User Accounts
2. Click on "Change the way users log on or off"
3. Uncheck "Use the Welcome Screen" - Choose Apply
4. Close the User Accounts window and the Control Panel
5. The next time you reboot your computer, the classic login prompt will be used

To enable Fast User Switching, you must also enable the Use the Welcome screen option. Also, Fast User Switching cannot be used when Offline Files are enabled.

Disable wgatray.exe - Some users are claiming that removing the WGATray.exe (or killing the WGATray.exe process) are working for them.

None of these methods are guaranteed to work and people are just experimenting. Meanwhile Microsoft is not willing to relent to crackers this time and are planning to release an update of WGADiag2.exe utility in the next few days.

WGADiag2 will also fix the problem with registry key permissions may cause the installation of Windows Genuine Advantage Notifications KB905474 to fail from Windows Update:

Here's a manual fix provided by Microsoft. These permissions can be repaired using Registry Editor as follows:

1. Click Start, and then click Run
2. In the Open box, type regedit, and then click OK
3. Expand HKEY_CLASSES_ROOT
4. Locate the subkey HKEY_CLASSES_ROOT\LegitCheckControl.Legi…
5. Right-click the subkey and select Permissions….
6. Ensure that Administrators allowed Full Control permission
7. Repeat steps 3-6 for the subkey
HKEY_CLASSES_ROOT\LegitCheckControl.Le…

Microsoft has also published a kB article if the Windows Genuine Advantage (WGA) validation check process does not validate successfully on a Microsoft Windows XP-based computer, and you receive one or both of the following error messages:

Product Key Inaccessible 0x80080212

This problem occurs when you do not have the appropriate permissions for the Windows Genuine Advantage\Data folder. In the Permissions for Users section, make sure that Read & Execute, List Folder Contents and Read permissions are given. If the previous steps fail, start the computer in Safe Mode and rename the %allusersprofile%\Application Data\Windows Genuine Advantage directory.

Wednesday, 25 January 2012

How to Change Windows7 Login Screen.


Hello Friends, Thanks for watching my first post on How to make folders as CON,AUX,NUL etc. in windows .Keep appreciating like this,it makes me more enthusiastic to share more tricks with you guys.
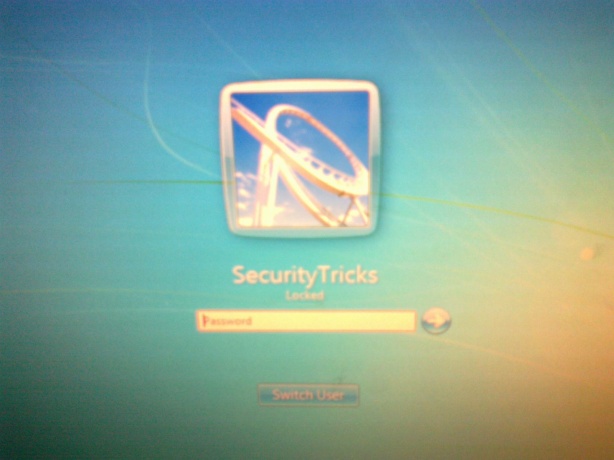
Today i am going to share a trick on “How to Change Windows7  login screen” . Well commonly we have login screen as below —

   logonscreen_previous


Well if want to customize it,you just have to follow simple steps below–
Go to Start >Run >Type Regedit . i.e open registry editor.
Now Go toHKEY_LOCAL_MACHINESOFTWAREMICROSOFTWINDOWSCURRENTVERSIONAUTHENTICATIONLogOnUIBackground
Make a DWORD Value with the name OEMBackground and set its value to 1 .

Then,Go to “SystemDrive:WindowsSystem32oobe” .
Create a folder named “info”
In ‘info’ create a folder named as ‘backgrounds”
In ‘backgrounds’ put your desired login-screen file (better be in ‘.jpeg’ format ) with the name‘backgroundDefault’.
One thing you need to keep in mind that size of this file should be less than ’256 kb’ otherwise windows won’t accept it as log-in screen.
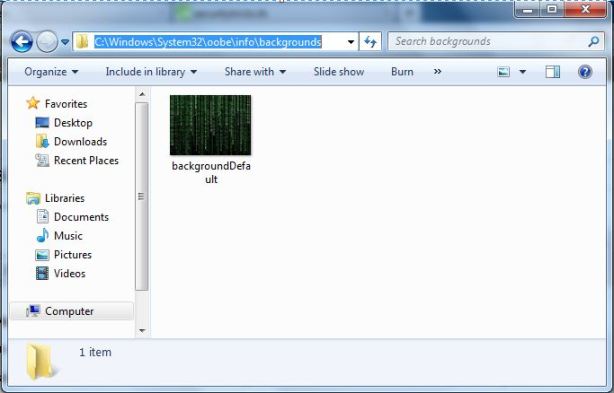
Now whole path should be as as C: is System Drive –
“C:WindowsSystem32oobeinfobackgroundsbackgroundDefault.jpeg”
loginscreen_filelocation


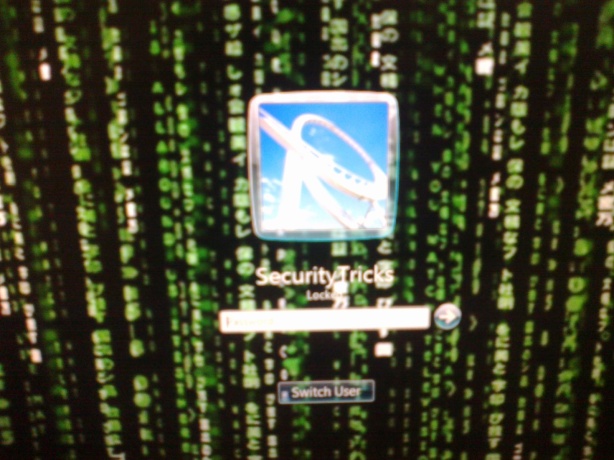
Now the login screen changed to below one–
logonscreen_new


If you like this creation then you can share it with your friends. And for support you can ask in comments.